2013/07/31更新了關於iOS6的部份內容.
行事曆功能是在iOS5就提出的, 在iOS6部分會有一些不同, 不過大致內容都是差不多的; iOS7的部份因為我電腦Xcode5-DP只要打code就會crash, 所以等之後再來做一些補充囉.
行事曆功能主要是使用EventKit.framework; 在EventKit中, 除了行事曆(Canlendar)外, 同時也包含提醒事項(Reminders)的功能, 在修改/新增會需要使用到EKEventStore來做操作.
在這篇文章裡主要會介紹到Calendar的部份, Reminder的操作就要請大家自己嘗試了.
開始之前
我們主要會用到幾個Class, 分別是:
EKEventStore
EKCalendar
EKEvent
EKAlarm
EKEventStore主要是讓我們管理EKCalendar以及EKEvent, EKAlarm是可以在EKEvent中加入提示的鬧鐘.
EKEventStore
eventStore在行事曆以及提醒事項的功用是最重要的, 主要是負責建立/刪除/修改行事曆(提醒事項)及事件(EKEvent); 同時也是用來搜尋Event的主要Class.
建立EKEventStore Instance 1
self . eventStore = [[ EKEventStore alloc ] init ];
如果你是在iOS6, 你至少需要執行一次取得權限的動作
iOS6, 取得User的許可 1
2
3
4
5
6
7
8
9
10
11
12
13
14
15
16
//EKEventStore request permission method
- ( void ) requestAccessToEntityType: ( EKEntityType ) entityType completion: ( EKEventStoreRequestAccessCompletionHandler ) completion ;
//
self . eventStore = [[ EKEventStore alloc ] init ];
// after EKEventStore init., get user permission.
EKEventStoreRequestAccessCompletionHandler handler = ^ ( BOOL granted , NSError * error ){
if ( granted ) {
// 允許使用 …
// your statement …
} else {
// 不允許 …
// other statement …
}
};
// 這邊使用EKEntityTypeEvent, 是要存取user iDevice的行事曆; 如果要使用提醒事項就改用EKEntityTypeReminder
[ self . eventStore requestAccessToEntityType: EKEntityTypeEvent completion: handler ];
除此之外, 你也可以用EKEventStore的Class Mehtod authorizationStatusForEntityType:來判斷是否要取得允許或其他對應的動作
iOS6, 判斷目前的Auth狀態 1
2
3
4
5
6
7
8
9
10
11
EKAuthorizationStatus authState = [ EKEventStore authorizationStatusForEntityType: EKEntityTypeEvent ];
if ( authState == EKAuthorizationStatusAuthorized ) {
NSLog ( @"EKAuthorizationStatusAuthorized" );
} else if ( authState == EKAuthorizationStatusDenied ) {
NSLog ( @"EKAuthorizationStatusDenied" );
} else if ( authState == EKAuthorizationStatusRestricted ) {
NSLog ( @"EKAuthorizationStatusRestricted" );
} else {
NSLog ( @"EKAuthorizationStatusNotDetermined" );
}
到這邊, 我們已經完成了EKEventStore的設置, 接著就可以直接建立/修改Event or Calendar
EKEvent & EKCalendar的實體, 都需要使用EKEventStore來建立實體, 而不是使用method init
加入Event到Calendar
接著, 我們建立一個Event到Calendar
建立EKEvent實體, 並加入default Calendar 1
2
3
4
5
6
7
8
9
10
11
12
13
14
15
16
17
18
19
EKEvent * myEvent = [ EKEvent eventWithEventStore: self . eventStore ];
myEvent . calendar = self . eventStore . defaultCalendarForNewEvents ;
myEvent . title = @"該更新部落格了" ;
myEvent . location = @"Green's Home." ;
myEvent . notes = @"這次要寫的內容是關於iOS行事曆的部份, 主要建立一個新的Event還有Calendar" ;
myEvent . startTime = [ NSDate date ];
myEvent . endTime = [ NSDate dateWithTimeIntervalSince1970: [ myEvent . startTime timeIntervalSince1970 ] + 3600 ];
myEvent . timeZone = [ NSTimeZone timeZoneWithName: @"Asia/Taipei" ];
NSError * error ;
BOOL action = [ self . eventStore saveEvent: myEvent
commit: YES
span: EKSpanThisEvent
error: & error ];
if ( action ) {
NSLog ( @"save event success:eId:%@" , myEvent . eventIdentifier );
} else {
NSLog ( @"save event failure, error:%@" , error );
}
在上面, 我們使用[EKEvent eventWithEventStore:self.eventStore]來建立一個event, 並且將這個event設定了一些基礎內容(title/ location/ notes …etc.), 並且讓這個事件出現在iDevice的預設行事曆中, 儲存成功的話, 就會在行事曆中出現一個event; 如果你希望之後還可以繼續在你的App內維護這個Event, 你需要把eventIdentifier特別記錄下來,搭配下面的方式取得Event, 這樣之後才有辦法去維護這個Event.
取得上次建立的Event 1
EKEvent * event = [ self . eventStore eventWithIdentifier: YOUR_EVENT_IDENTIFIER ];
為Event加上Alarm
建立EKAlarm並加入Event中 1
2
3
4
5
6
7
8
9
10
11
12
13
14
15
16
17
18
19
20
EKEvent * myEvent = [ EKEvent eventWithEventStore: self . eventStore ];
/**
* ...
*/
NSInteger sendTime = [[ NSDate date ] timeIntervalSince1970 ];
//一小時前
NSDate * alarmDate0 = [ NSDate dateWithTimeIntervalSince1970: sendTime - ( 60 * 60 * 1 )];
EKAlarm * alarm0 = [ EKAlarm alarmWithAbsoluteDate: alarmDate ];
//一天前
NSDate * alarmDate1 = [ NSDate dateWithTimeIntervalSince1970: sendTime - ( 60 * 60 * 24 )];
EKAlarm * alarm1 = [ EKAlarm alarmWithAbsoluteDate: alarmDate2 ];
myEvent . alarms = [ NSArray arrayWithObjects: alarm0 , alarm1 , nil ];
NSError * error ;
BOOL action = [ self . eventStore saveEvent: myEvent
/**
* ...
*/
到這邊, 就是一個有提示功能的行事曆事件的建立方式, 中間一些參數沒有介紹到(ex:參與者), 大家可以自己去試試看.
為Application建立一個新的Calendar
接著, 我想把這個事件加入一個自定義的的Calendar, 接著下來我們先建立一個新的Calendar; 在建立Calendar的部份會使用到一個新的class EKSource, 來自EKEventStore’s property sources.
建立一個Calendar 1
2
3
4
5
6
7
8
9
10
11
12
13
14
15
16
17
18
19
20
21
22
23
24
25
26
27
28
29
30
31
32
//step1
//這邊取得的方式只有在iOS5才能使用, iOS6會另外說明
EKSource * theSource = nil ;
NSArray * tempSources = self . eventStore . sources ;
for ( EKSource * source in tempSources ) {
if ( source . sourceType == EKSourceTypeLocal ) {
theSource = source ;
break ;
}
}
//step2
EKCalendar * calendar = nil ;
if ( theSource ) {
calendar = [ EKCalendar calendarWithEventStore: self . eventStore ];
calendar . CGColor = [ UIColor orangeColor ]. CGColor ;
calendar . title = @"愛合購行事曆" ;
calendar . source = theSource ;
} else {
NSLog ( @"Error: Local source not available" );
return ;
}
//step3
NSError * error = nil ;
BOOL result = [ self . eventStore saveCalendar: calendar commit: YES error: & error ];
if ( result ) {
// save your calendar.calendarIdentifier
} else {
NSLog ( @"Error saving calendar: %@." , error );
}
Step1
在Step1的步驟, eventStore.sources, 其實可以把它當成calendar groups(例如iCloud’s or gmail accounts, gmail在不同的帳號可以建立自己的行事曆), 然後我們取出type=EKSourceTypeLocal來做為我們要使用的source(ps. iOS6比較特別, 後面會有額外的程式修改).
Step2
接著我們使用EKCalendar’s Class Method calendarWithEventStore:來建立calendar instance, 接著設定calendar的顏色、標題還有我們在Step1取得的source.
Step3
最後儲存calendar到iDevice的Database中; 如果成功的話, 記得把calendar.calendarIdentifier記錄下來, 下次只要使用下面的方式就可以直接取得這個calendar.
取得上次建立的Calendar 1
EKCalendar * eventCalendar = [ self . eventStore calendarWithIdentifier: YOUR_CALENDAR_IDENTIFIER ];
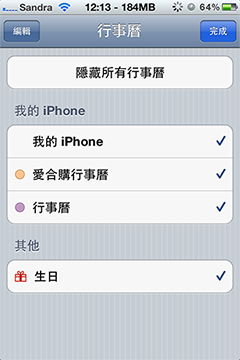
之後再行事曆的列表中, 你就可以看到你剛剛建立的Calendar(ex:我剛剛建立的是愛合購行事曆)
iOS6中的差異
接著在iOS6中, 該如何取得可以使用的source, 只要將剛剛Step1中的判斷sourceType(line 6)做一些調整, 如下:
@ iOS6, 取得source的調整 1
if ( source . sourceType == EKSourceTypeCalDAV && [ source . title isEqualToString: @"iCloud" ])
如果繼續使用EKSourceTypeLocal並不會出現錯誤, 但是就不會出現在列表之中; 另外如果不指定source.title=iCloud的話, 可能會因為沒有權限修改該group(ex:gmail account)而失敗.
關於上述的source.title=iCloud的完整原因是, 你並無法建立自己的EKSource, 而在App中你只能存取iCloud的source去做新增Calendar的動作.
iOS6補充(2013/07/31)
這幾天有注意到一件事情, 如果你在iCloud的設定中, 行事曆跟提醒事項如果有一個沒有打開, 就無法使用, 在獲得permission完依然無法使用.
再來, 因為只能存取iCloud下的行事曆, 但是iCloud的source.title並不一定會是iCloud, 有可能是其他的內容(ex:appId), 所以當發生這種事情的時候, 可能有兩種作法
去提醒使用者或者設定一個欄位讓他去輸入source的title, 以便存取
可以建議使用者到iCloud去, 點擊帳號進到裡面後, 將帳號描述改成iCloud(or another)
這樣依照上面的程式, 你就可以存取到iCloud的eksource, 並去新增修改你的Calendar
題外話
最近總想著改變一些記錄的方式, 不過有一點不得其門而入, 像是該如何把東西些的足夠深入, 內容方面也是比較精簡; 在一些敘述的方法跟內容的考慮上就變得很難拿捏, 該如何調整可能只能慢慢去做嘗試跟改變了, 也很希望有在看的人可以給我一些建議跟方向, 一起討論程式方面也沒有問題, 謝謝.